WINDOWSHELF SLIMLINE INSTALLATION GUIDE
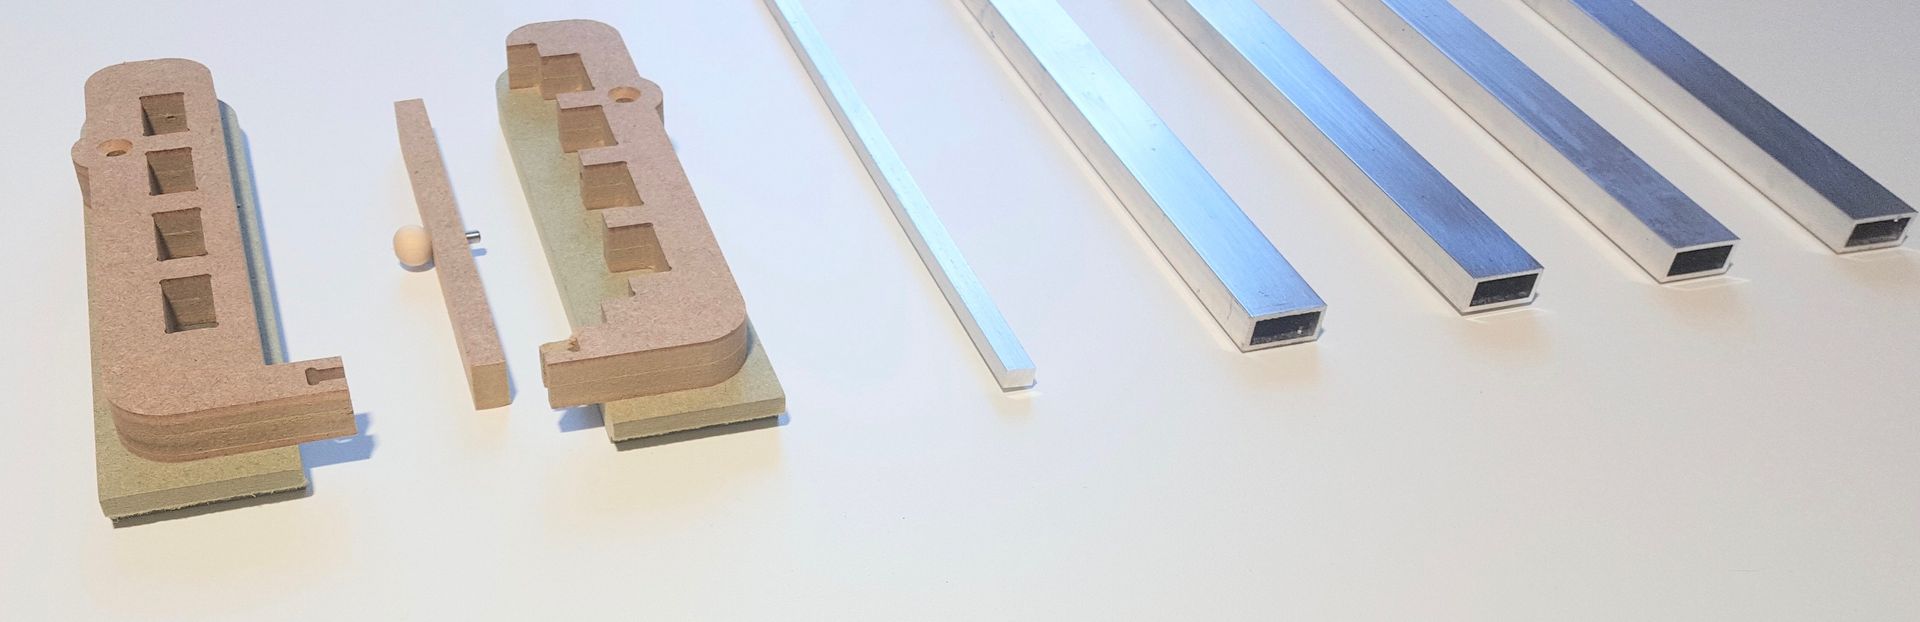
Components
1 x Left hand Bracket
1 x Right hand Bracket with cover
4 x Aluminium Slats
1 x Aluminium Safety sail
Both brackets are supplied pre fitted with 3M™ Very High Bond (VHB™) double sided tape.
Tools required
Tape measure
Pencil
Craft Knife
If you haven't used our custom cutting service, you will also need a suitable metal saw and saw bench.
IMPORTANT: DO NOT REMOVE THE PROTECTIVE FILM FROM THE TAPE UNTIL FINAL INSTALLATION
Step 1
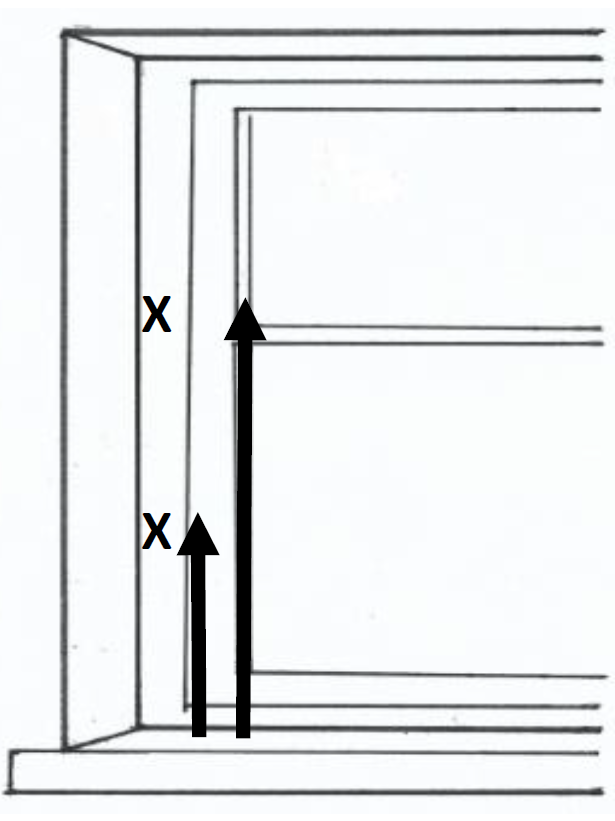
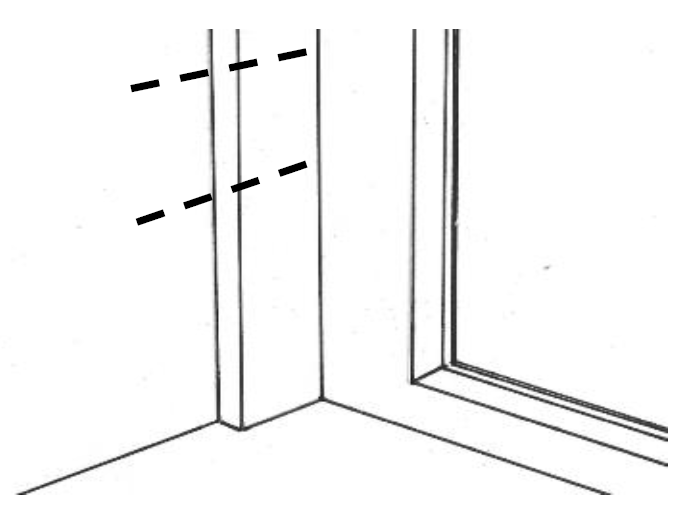
Starting on the LEFT hand side and measuring UP from the window sill. Use a tape measure to determine the fitting location of your shelf. Mark location(s)on the window frame.
DO NOT OBSTRUCT WINDOW CATCH.
Step 2
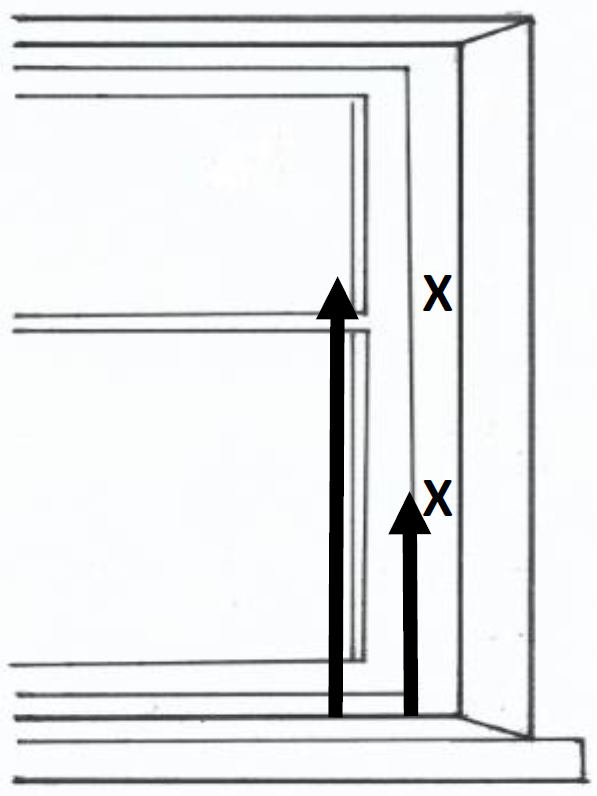
Transfer measurements from the LEFT hand side over to the RIGHT hand side. Mark corresponding location(s) on the window frame.
Step 3
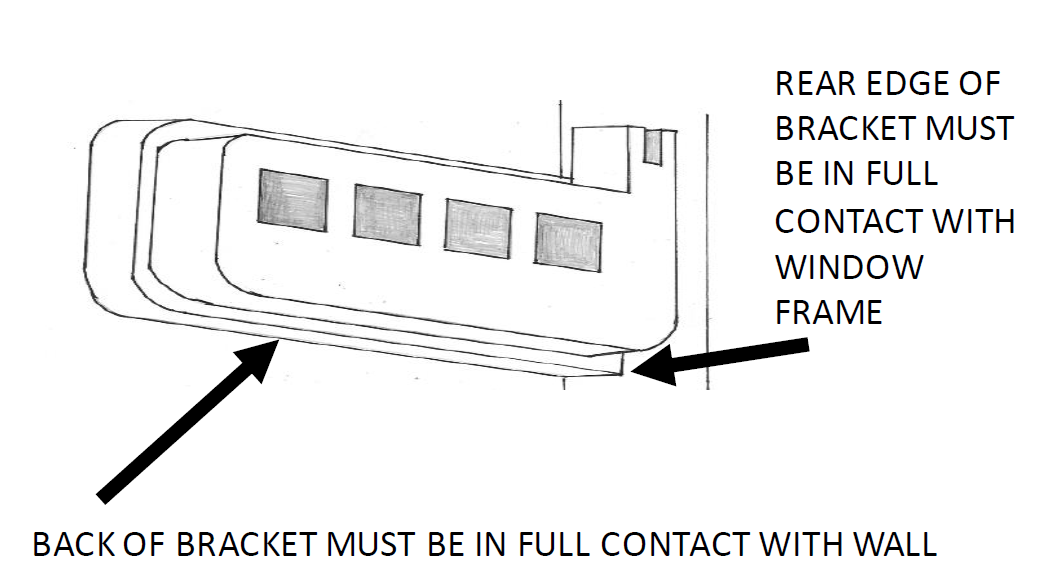
Without removing the backing film, offer each bracket up to its intended location. Make certain that the brackets rear edge is in full contact with the window frame AND that its back face is in full contact with the wall.
If your window has a beading strip or trim disguising the join between the window frame and the wall, go to step 3a.
Step 3a
A beading strip in this location will stop your bracket from fitting properly.
Remove section by marking the top and bottom of the bracket against the trim. Use a craft knife or wood chisel to cut away this section.
BEFORE proceeding to step 4, re-check your measurements, making sure that the bracket positions are correct AND that the shelf does not obstruct the window catch.
SURFACES MUST BE DRY AND DUST FREE
Step 4
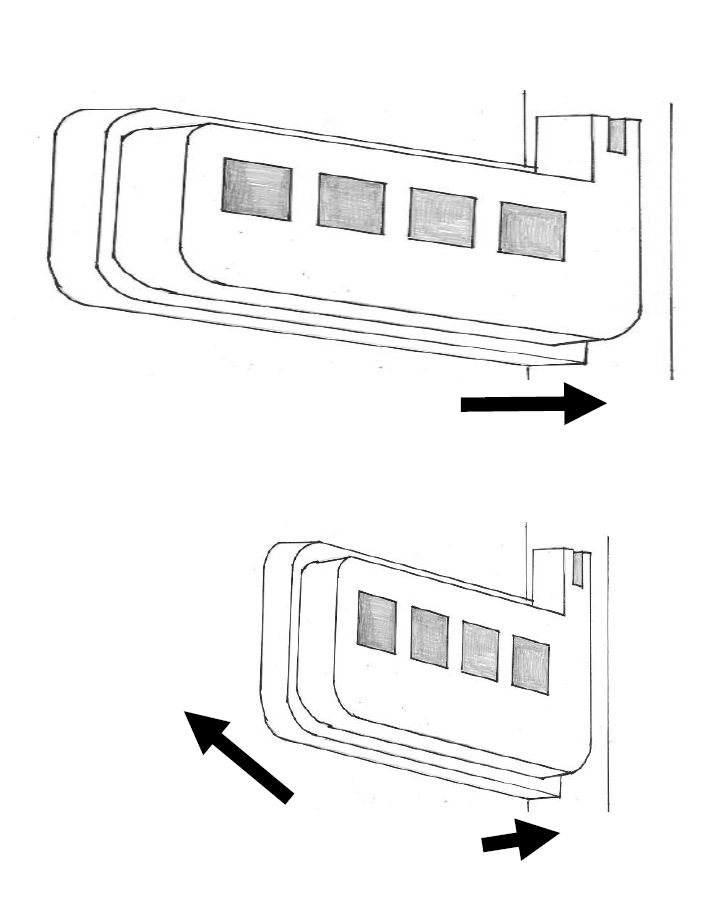
Remove the protective film from the back of the bracket. Position the rear edge of the bracket against the window frame THEN slide it sideways onto the wall. Push securely into place.
Step 5
Cutting the aluminium components
If you used our custom cutting service, move on to step 6.
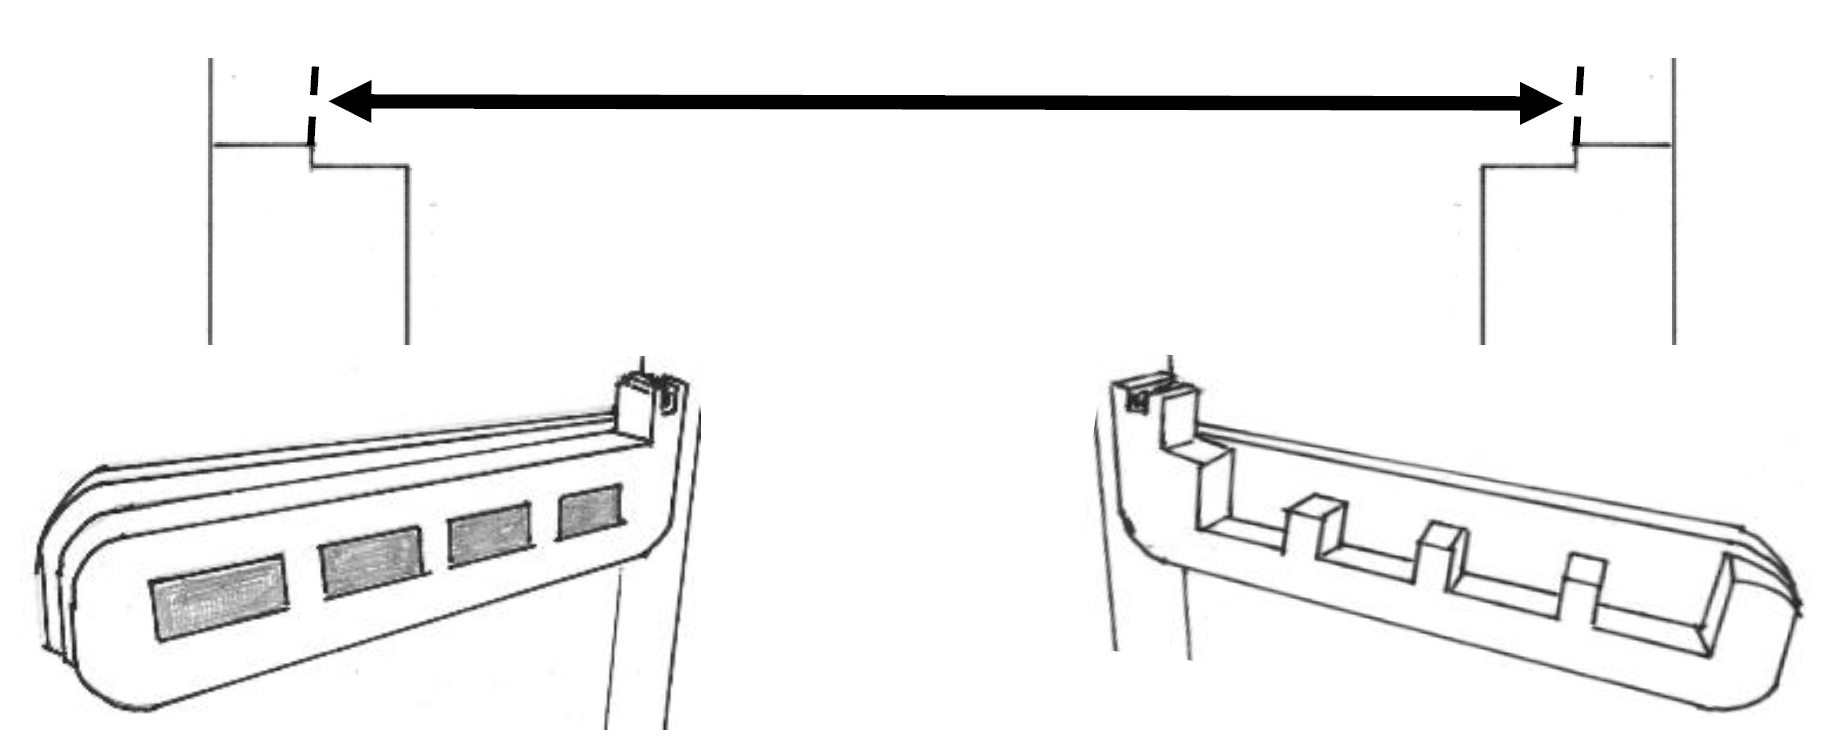
Once fitted, measure between the brackets at the position shown.
Cut each aluminium slat 0.5cm longer than this dimension.
Cut the aluminium rear safety rail 1cm longer than this dimension.
Aluminium components can be cut with a handsaw fitted with a metal blade or with a suitable power tool:
- Make sure components are held securely whilst cutting.
- Use a mitre box or cutting guide to keep the cut ends square.
- Smooth off sharp edges using a metal file or course sandpaper.
- Take appropriate safety precautions when cutting.
Step 6
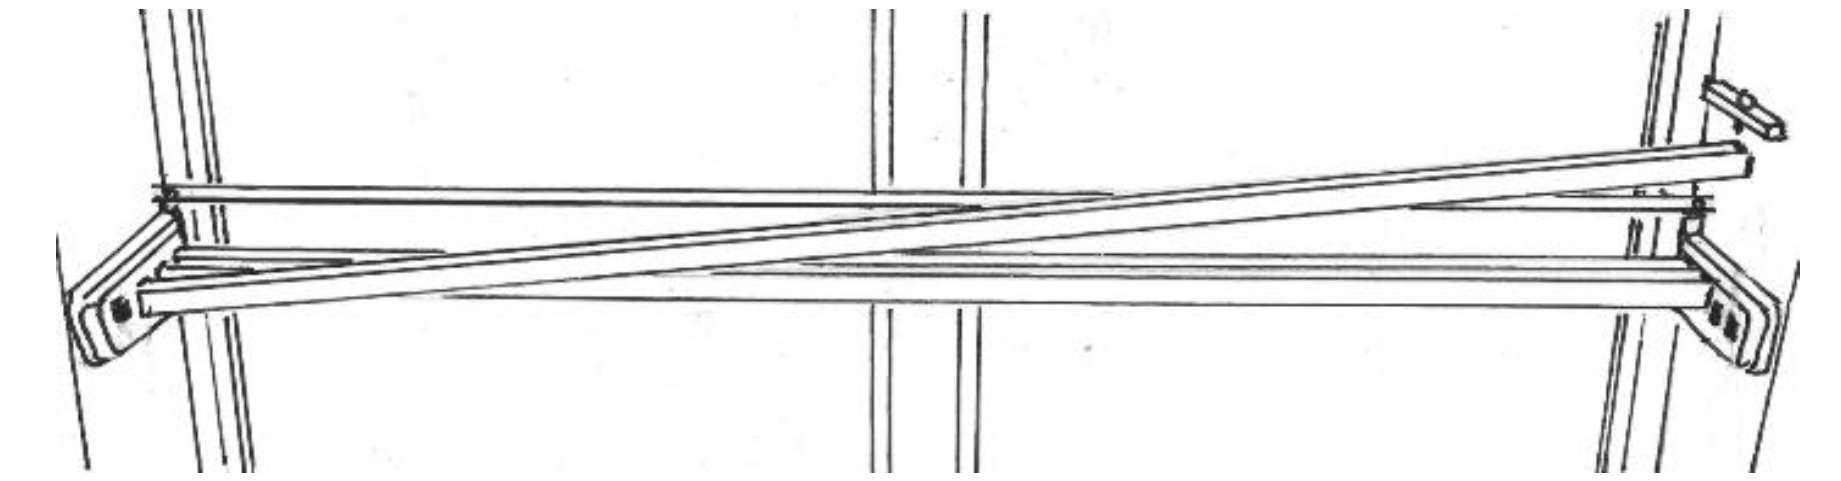
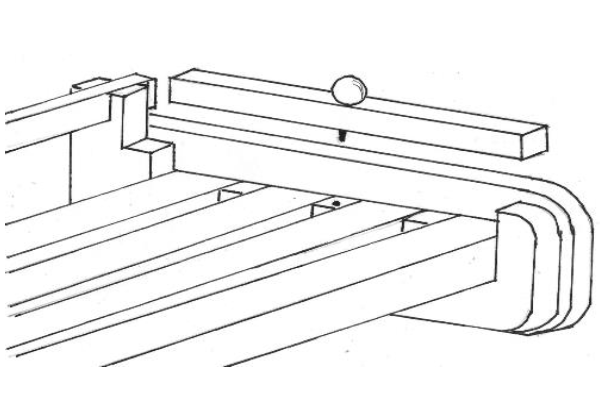
Install the aluminium slats by first inserting the LEFT slat end into the LEFT hand bracket body. This achieved by raising the other end of the slat as illustrated.
Next, lower the RIGHT slat end into the appropriate slot in the RIGHT hand bracket.
Finally, attach the rear safety rail into the slots located towards the rear of each bracket.
Remove shelf components at any time by reversing the following installation procedure.
Step 7
Ensure each slat is positioned fully into the RIGHT hand bracket and then fit the cover plate.
WAIT 24 HOURS BEFORE LOADING YOUR SHELF
Need help installing WINDOWSHELF?
Call
01202 876618 or email
sales@windowshelf.co.uk
Got a question about WINDOWSHELF?
Call us
Email us